Note: Pick a USB port and leave the usb cable inserted there undisturbed Once you have installed the converter cable to work on a usb port it is highly recommended you leave it plugged in. If you plug it in another USB port it will be reassigned a different Comm Port number with high probability. After doing this even if you unplug and then replug into the original USB port what will happen is that a new comm port number assignment 2 higher than the one you started at will be assigned.
- Example: My normal assignment is comm port = 3. I unplugged the usb cable and and plugged it in another USB port at which point it was assigned comm port =4. I then unplugged it and returned it to the original USB port. at which point it was assigned comm port number = 5. Not good. Pick a USB port and leave it there! The temperture control software only knows to communicate out the comm port number you tell it to use with the Comm Port Config tool in the software setup menu. If the assignment of the hardware changes the software will start throwing communications errors.
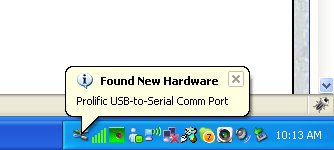
In order to get to a stable configuration once you have switched USB ports and installed the driver a 2nd or more times you must clear all the Prolific USB to Serial Comm Port (COM#) from your device manager and start again. If you do not do this it is very likely that every time you boot up the computer you will pop up the "Found new hardware" bubble. At that point you need to perform the phantom serial port clearing procedure.
The following steps are helpful to avoid repeatedly typing the long commands required to view phantom devices in the device manager. You can place them in a .bat file. This website does not allow .bat files to be uploaded due to security concerns. Thus I changed the extension my allports.bat file to allports.txt and uploaded it. You can copy the contents and paste in notepad. Then save off to allports.txt , use windows explorer to navigate to it and then change the .txt extension to .bat
- put it in a file in a location easy to reach from the command prompt. I created a folder at C:/ bat then place allports.bat in that folder
- use windows explorer to find this file and double click on it ...this will set the environment variable and bring up the device manager. If you want to drag and drop an shortcut on your desktop. Then no more fishing around to find and run the bat file.
This procedure allows you to see and uninstall phantom serial communications ports. Related Microsoft article here: Device Manager does not display devices that are not connected to the Windows XP-based computer
Steps
- Bring up the command prompt: Go to "Start", "Programs", "Accessories" and select "Command Prompt".
- At the command prompt type: set devmgr_show_nonpresent_devices=1 and press Enter. Note: You can avoid the tedious typing by putting these two lines in a .bat file and running the file at the command prompt. See footnotes.
- Bring up device manager. At the command prompt type: start devmgmt.msc and press Enter
- In device manager menu click View > Show hidden devices
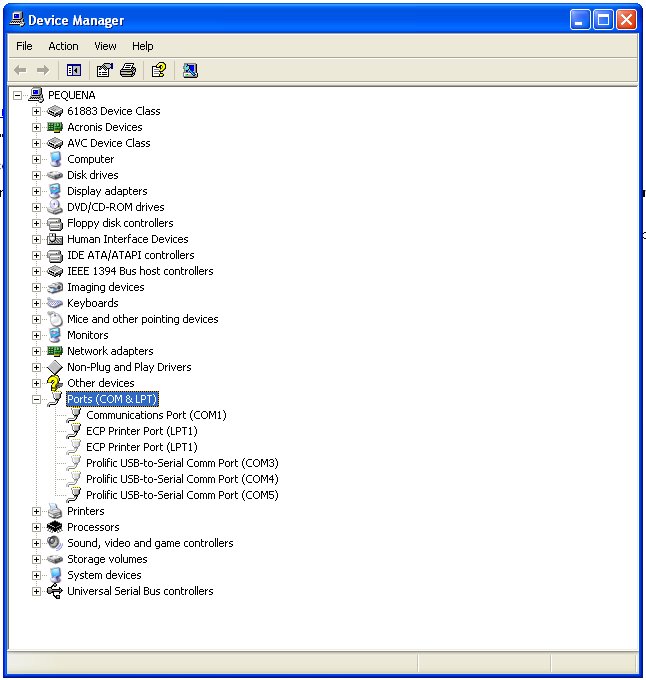
Below you can see the results of this procedure after I have purposely created 2 phantom installs of the serial cable. Example: My normal assignment is comm port = 3. I unplugged the usb cable and and plugged it in another port at which point it was assigned comm port =4. I then unplugged it and returned it to the original USB port. at which point it was assigned comm port number = 5.

As you can see I had 2 phantoms of the Prolific USB-to-Serial Comm Port ( COM#) that you can tell are phantoms because the little serial cable icon next to them are greyed out. The one where the USB to 422 converter is now residing is not greyed out. In this case it was COM5.
In my particular case I want to put my USB -422 converter installation back to COM#3 and leave it. This is not absolutely necessary if your install is working where it is at as long as you leave it there. In order to clear the phantoms do the following:
- Unplug the USB 422 converter
- high light COM5 > right click on it > click on UnInstall > click on OK when the warning panel comes up saying "Warning: You are about to uninstall this device from your system"
- repeat for 4 and 3. After this all my phantom ports were gone.
- Plug the USB 422 converter in. Now it is assigned the lowest comm port number available which is port number =3
- leave COM1 alone. that is my motherboards hardware serial port.
You can see all the action by watching the device manager. It will refresh automatically after each action.
FootNotes
When you close the command prompt window, Windows clears the "devmgr_show_nonpresent_devices=1" variable that you set and prevents phantom devices from being displayed when you select "Show hidden devices".
If you see the "Found new hardware" balloon pop up in the lower right hand corner of your display then its a good bet that a new serial comm port number has been assigned! If you have already installed the USB 422 driver then expect problems communicating with your temperature controller because the software will expect to see the temperature controller on the old com port number. When first installing the driver its not an issue.

|